Adding lessons to courses
The actual content of the lesson is added using what is called the Block Editor. The block editor is a part of WordPress and allows you to embed various content in the form of blocks – e.g. paragraphs, headings, lists and images.
Now fill in the information about your new lesson and then click again on the blue button labeled “Publish”, located at the top right of the screen. Afterwards, click on the WordPress icon at the top left of the screen to return to the dashboard.
Adding a lesson
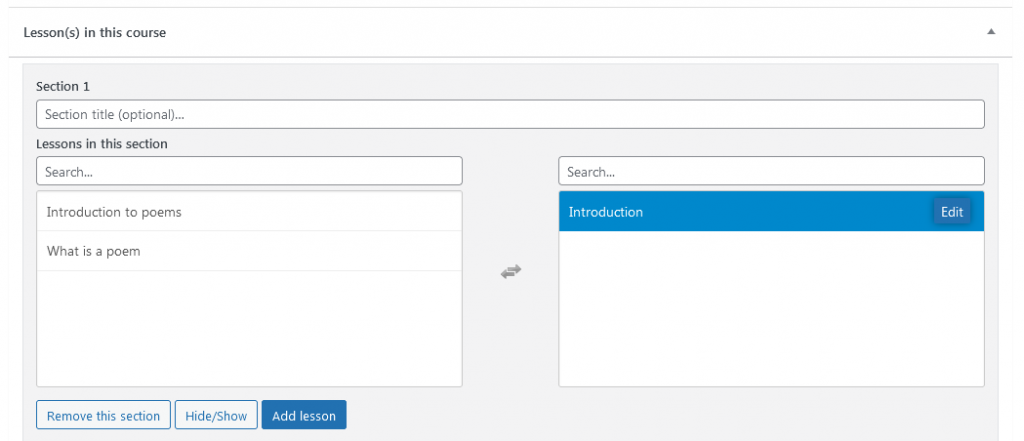
To insert the new lesson into your course, open the courseyou have already created. In the course editor, scroll down until you reach the “Lesson(s) in this course” section.
There you will now see the lesson you just published. Add the lesson to the course by clicking on it, moving it from the left to the right column. To remove the lesson from the course, you can click on it again.
Change the order of the lessons
When you have created several lessons, you can also change the order they appear in. To do this, click on the lesson and move it up or down while holding down the mouse button until the desired order is reached.
Edit or change existing lessons
You can edit or change an existing lesson at any time. To do this, select the appropriate lesson in the dashboard. Make your change and save your work by clicking the blue button labeled “Refresh” at the top right corner of the screen.
